Friday, May 27, 2005

*gulp*

*Gulp* Just put my final orders in to Happs ($330) and Ultimarc ($160). I've totaled everything up and I believe the whole project will end up costing me about $950. Looks like I may be selling my motorcycle afterall. :)

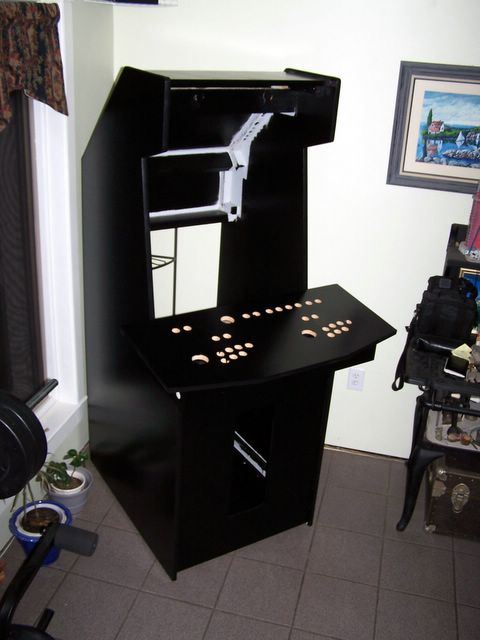
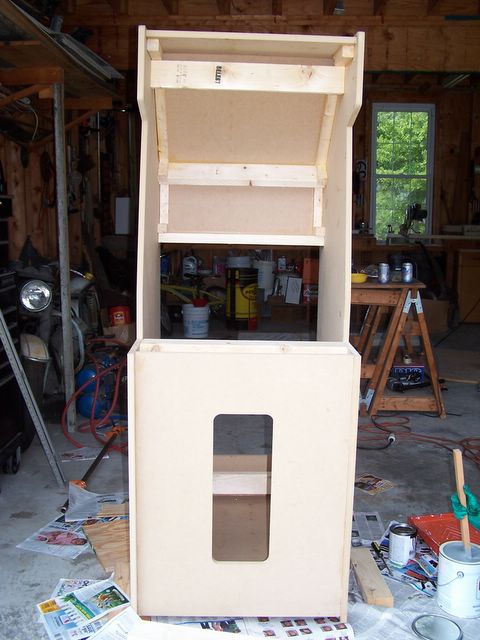
Recently I've installed the TV, Speaker Panel and the PC board. So now it's playable.
Left to do:
* Install / Mount Controls & Coin Door
* Marquee
* CP Overlay

Friday, May 20, 2005


Picture - Almost done w/ Construction Posted by Hello

Sunday, May 15, 2005

The Franken-PC

Today Ashley (my gf) and I put on the first coat of paint. It looks great! Can't wait to get through the painting phase though, I have paint all over me.

I scrounged together all the spare PC parts I've got and built the first computer for the cabinet. Here's what I ended up with:

  • 700mhz PIII
  • 448 MB RAM (256+128+64!)
  • 80 GB HD
  • WinXP
  • ATI Rage 128 Video Card
  • Sound Card, Ethernet Card
  • 2 Speakers + Subwoofer
Not too shabby. I first tested out Mame32 - it ran the oldies (pacman etc) flawlessly of course, and even the side scrollers (TMNT) ran fine but games such as Street Fighter II and NBA Jam choked up. Then I remembered something called FastMAME. Installed it and configured it and lo and behold it worked! I can play Street Fighter 2, Street Fighter vs X-Men, Metal Slug 4 without any hiccups at all. (NBA Jam still wasn't quite up to snuff, but I can live without that.) Sweet.

Saturday, May 14, 2005


After the primer. Posted by Hello


Ugly but functional. Posted by Hello


Future home of the CP Posted by Hello


Tinting our primer with a bit of black. Posted by Hello


The back. Posted by Hello


Looking into the cabinet towards the bottom back. Posted by Hello


Angled Photo Posted by Hello


Front Posted by Hello

Construction

Got a lot done over the last few days. Parents took the car out of town so I had the whole garage to work with.

1. Went to Lowe's for more materials. Bought casters, primer (Kilz), paint (Rustoleum Satin Black - oil based, they didnt have the semi-gloss variant) and a bit more 1.5 x 1.5" wood. Spent $72.
2. Began construction of the cabinet. Decided to use mostly the 1.5"s to link everything together and used the nailgun to piece everything together (used screws for the cabinet base and the control panel box). Also put five 2x4s in for support. There are no screws seen currently from the outside of the cabinet. Found out that upon cutting one of the sides of the cabinet the wood has a slight warp in it which distorted our calculations. Luckily its not too noticable and I doubt anyone but me will ever realize that a few things are slightly off. After getting it on its feet the cabinet feels very stable.
3. I'm leaving the speaker panel and the monitor panel for later. They need further consideration and can easily be added when I'm ready for them.
4. Sanded everything down, put a coat of primer on, sanded and then a second coat of primer.
5. Ordered a router bit (1/16th bit) and t-molding (60 ft from t-molding.com - $28 w/ shipping). Once those slots are cut, I can put the actual paint on the cabinet. Can't wait!

Future plans:
1. Cut Slots / install t-molding
2. Paint everything
3. Install speaker & monitor panels
4. Save enough money for buttons, joysticks etc. Order 'em up!
5. Get TV fixed (doesn't turn on, brother found it at work and it looks like somethings wrong with the capacitor - don't know if it'd be cheaper to buy a new TV or take a chance on this and hope the rest of the TV works fine - its the right size (26") and has a s-video port on the back.