Wednesday, August 20, 2008

It's been a long time since I've posted last. The ArinCade now has a new permanent home (hopefully) in my basement. I've upgraded the PC that is the backbone of the project and my good buddy Jason has helped me to begin to solder the connections on the control panel. Hopefully this will make the control panel connections more reliable.

Wednesday, June 15, 2005


ArinCade Posted by Hello


Too many wires! What a mess... Posted by Hello


CP (Overhead) Posted by Hello


Marquee Posted by Hello


CP Posted by Hello

Friday, May 27, 2005

*gulp*

*Gulp* Just put my final orders in to Happs ($330) and Ultimarc ($160). I've totaled everything up and I believe the whole project will end up costing me about $950. Looks like I may be selling my motorcycle afterall. :)

Recently I've installed the TV, Speaker Panel and the PC board. So now it's playable.
Left to do:
* Install / Mount Controls & Coin Door
* Marquee
* CP Overlay

Friday, May 20, 2005


Picture - Almost done w/ Construction Posted by Hello

Sunday, May 15, 2005

The Franken-PC

Today Ashley (my gf) and I put on the first coat of paint. It looks great! Can't wait to get through the painting phase though, I have paint all over me.

I scrounged together all the spare PC parts I've got and built the first computer for the cabinet. Here's what I ended up with:

  • 700mhz PIII
  • 448 MB RAM (256+128+64!)
  • 80 GB HD
  • WinXP
  • ATI Rage 128 Video Card
  • Sound Card, Ethernet Card
  • 2 Speakers + Subwoofer
Not too shabby. I first tested out Mame32 - it ran the oldies (pacman etc) flawlessly of course, and even the side scrollers (TMNT) ran fine but games such as Street Fighter II and NBA Jam choked up. Then I remembered something called FastMAME. Installed it and configured it and lo and behold it worked! I can play Street Fighter 2, Street Fighter vs X-Men, Metal Slug 4 without any hiccups at all. (NBA Jam still wasn't quite up to snuff, but I can live without that.) Sweet.

Saturday, May 14, 2005


After the primer. Posted by Hello


Ugly but functional. Posted by Hello


Future home of the CP Posted by Hello


Tinting our primer with a bit of black. Posted by Hello


The back. Posted by Hello


Looking into the cabinet towards the bottom back. Posted by Hello


Angled Photo Posted by Hello


Front Posted by Hello

Construction

Got a lot done over the last few days. Parents took the car out of town so I had the whole garage to work with.

1. Went to Lowe's for more materials. Bought casters, primer (Kilz), paint (Rustoleum Satin Black - oil based, they didnt have the semi-gloss variant) and a bit more 1.5 x 1.5" wood. Spent $72.
2. Began construction of the cabinet. Decided to use mostly the 1.5"s to link everything together and used the nailgun to piece everything together (used screws for the cabinet base and the control panel box). Also put five 2x4s in for support. There are no screws seen currently from the outside of the cabinet. Found out that upon cutting one of the sides of the cabinet the wood has a slight warp in it which distorted our calculations. Luckily its not too noticable and I doubt anyone but me will ever realize that a few things are slightly off. After getting it on its feet the cabinet feels very stable.
3. I'm leaving the speaker panel and the monitor panel for later. They need further consideration and can easily be added when I'm ready for them.
4. Sanded everything down, put a coat of primer on, sanded and then a second coat of primer.
5. Ordered a router bit (1/16th bit) and t-molding (60 ft from t-molding.com - $28 w/ shipping). Once those slots are cut, I can put the actual paint on the cabinet. Can't wait!

Future plans:
1. Cut Slots / install t-molding
2. Paint everything
3. Install speaker & monitor panels
4. Save enough money for buttons, joysticks etc. Order 'em up!
5. Get TV fixed (doesn't turn on, brother found it at work and it looks like somethings wrong with the capacitor - don't know if it'd be cheaper to buy a new TV or take a chance on this and hope the rest of the TV works fine - its the right size (26") and has a s-video port on the back.

Wednesday, April 13, 2005

small update

got proper screws from my brother who does counter tops for a living. returned old screws and bracket for bigger bracket and wood glue. began construction on cabinet. ive noticed two or three spots where the wood is about 1/8th inch off, but its nothing i can't work with... oh well, live and learn.

Wednesday, April 06, 2005


Its almost... too easy.... Posted by Hello


Cuts button holes and everything Posted by Hello


My buddy Chip getting the layout set up. Posted by Hello

Woodworking

Whew, six hours later I have all of my pieces cut. Things went pretty smoothly. About half of our day was spent putting all the info into the computer, the rest was spent eating pizza and loading boards onto the table. The computer did all the hard work. :-)

Thanks to my buddy Chip for all the hard work today. This would have taken me about six months to get around to doing.

List of things to work on:
* Need to verify holes for joysticks, spinner and trackball.
* Rework CP artwork to meet slight design change.

Friday, March 18, 2005

A Day of Shopping...

Went to Lowes today. Bought most everything to get my cabinet going. Spent WAY more than i intended. Ah well, no one said this hobby would be cheap. But at least now I have something to get going on. Thankfully I had my girlfriend along to help move those MDFs - those things are heavy! I think I'm gunna need to return these screws for some shorter ones. I'm thinking 2.5" screws for screwing the 2" pieces into the walls of the cabinet and maybe 3.5" to screw the 2" into the 2x4's. Hope to get the pieces cut this week sometime. Will try to remember to take pictures.

As an aside, I think Sasquatch meant to say 2"x2" pieces instead of 1"x1". I'll need to ask him about this. Poor guy, he's gunna get tired of me quick. :-P Also I need to ask him about screw length.


2 x 4 x 92 Wood x2 $ 5.86
2 x 2 x 8 Wood x2 $ 3.50
MDF 5/8" 4 x 8 x1 $ 12.99
Drywall screws (1 lb) x1 $ 4.31
2" corner braces x4 $ 9.40
2.5" corner braces x2 $ 5.26
24" x 48" Plexiglass x1 $ 13.97
MDF 3/4 4 x 8 x3 $ 65.25


Tax
$ 6.03
TOTAL
$126.57

Thursday, March 17, 2005

More thoughts before I forget them...

I wrote Sasquatch regarding the black finish he put on the AP3 and he kindly responded with the following:

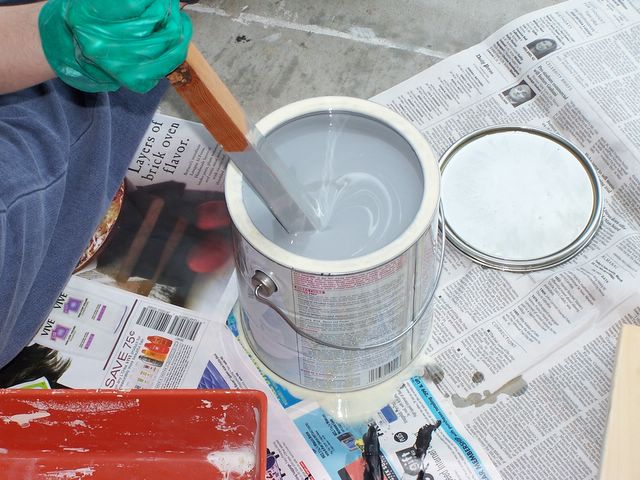
"I used a couple coats of a basic tinted wood primer, and a couple of coats of "Rustoleum Satin Classic Low-Sheen Finish" paint in satin black. The Rustoleum Satin has a really nice "Williams cabinet" quality to it: it's not a gloss, but it's not dull either. Oh, and I rolled the primer and paint on with a fine-nap roller, and I sanded in between each coat of primer and paint with a fine-grit sandpaper."

Hopefully he does not mind me quoting him here. :-)

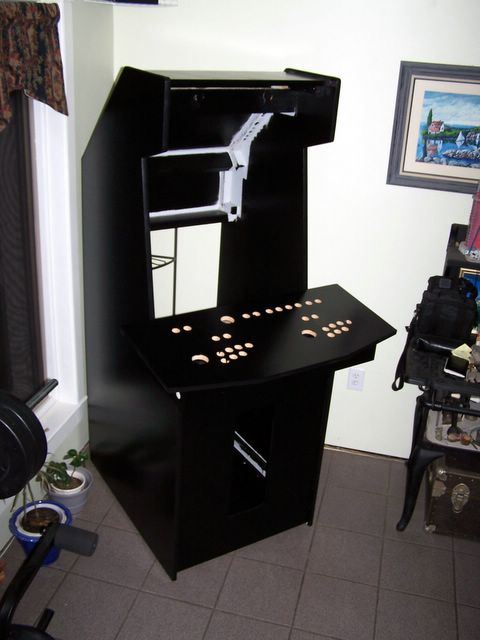
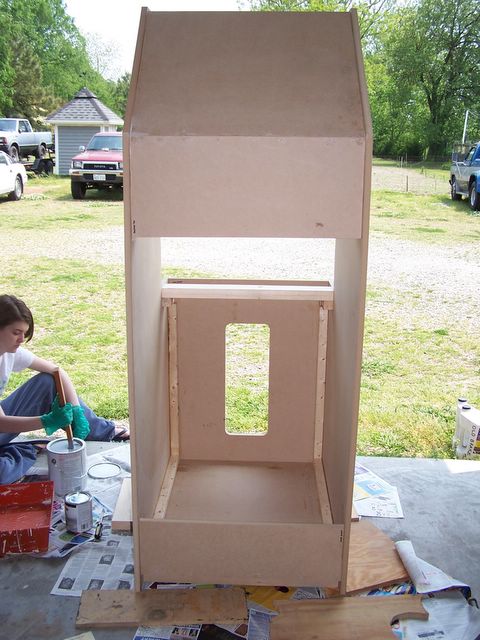
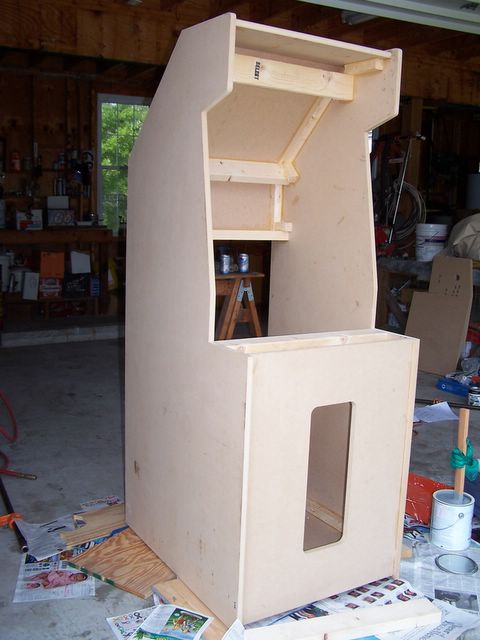
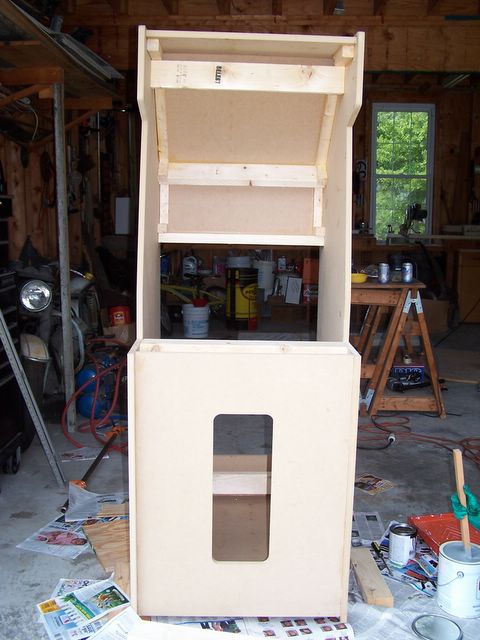
I plan to go purchase the MDF boards tomorrow, as well as a sheet of plexi glass. I really don't have the money to be spending on this now, but I have to get started on *something*! I did order the book "Project Arcade: Build Your Own Arcade Machine" from amazon.com yesterday. Though I'm sure I could find a lot of this information on the web, it'll be nice to have it all in one place.

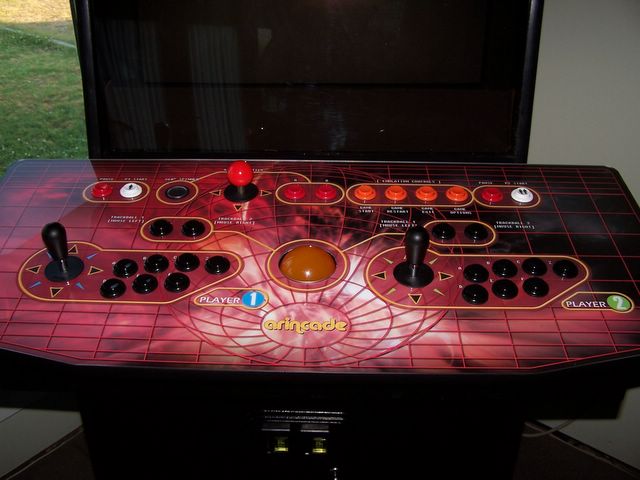
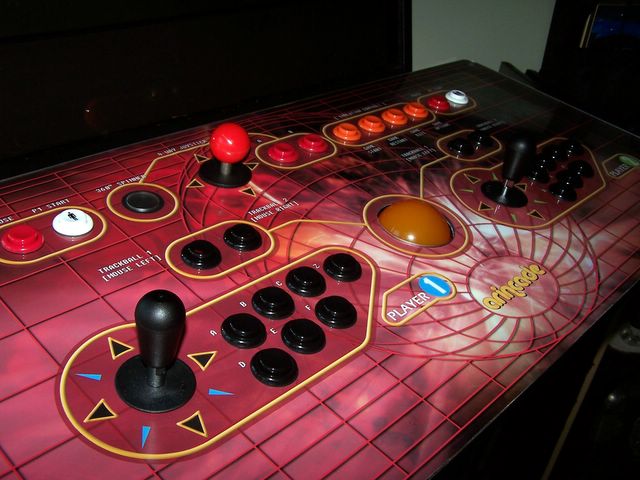
I'm still not sure how my control panel design will work out. I plan to use the AP3 layout, but I'm tossing around the idea of replacing the flight stick he has with another 4-way joystick. I'm also curious how comfortable using the spinner and the 4-ways are seeing as they require some repositioning of the hands in not-so-natural configurations.

Other modifications I'm considering are:
* Instead of having two sets of pause/quit buttons, I may use the extra space on the keyboard-converter to make two side buttons for pinball usage.
* Modifying the coin acceptor to accept any type of coin, thus making it a piggy bank of sorts. Saw a website page regarding this. Will update later. I really like the idea of having the machine take tokens or coins, because it did detract from the experience to be able to just pound the "5" key for more credits. So in my case, this is a must-have.

EDIT: Decided to use the CP & Artwork Layout from Arc-Eden (from ras2a). http://forum.arcadecontrols.com/index.php/topic,22149.0.html

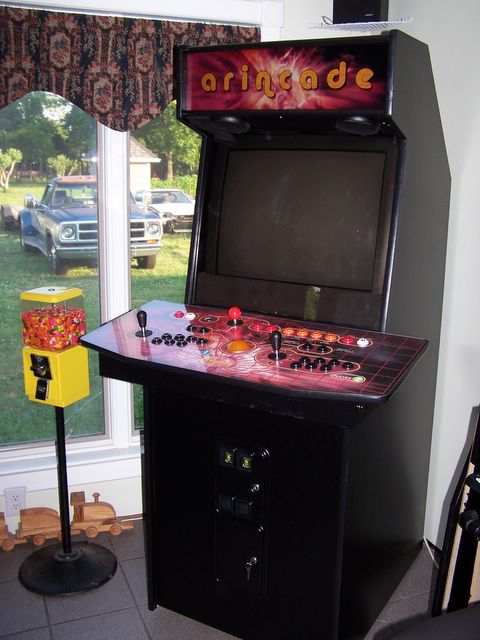
The MAME machine will likely find its eventual home in the corner of our living room which has double wide doors to make load ins and outs easier for future moves if necessary. I plan to do initial building in our garage though once I clear some space out.

Wednesday, March 16, 2005

Welcome and Hello!

This site is going to be dedicated to the building of a MAME Arcade Cabinet. I'm going to do this so I can document all my steps and maybe answer a few of the questions that other people have as I get to them.

I've never done a MAME cabinet before, so I'm likely more clueless than most about what it takes. But I'm excited to take on this project and see where it goes.

Last night I had a few friends over and we had a blast replaying the Simpsons arcade game on my PC and I think the prospect of having everyone play on an actual machine and the enjoyment they'd probably experience makes this whole project worth doing.

I've settled on using Arcade Paradise 3 (http://www.arcadeparadise.org) as the main design. I may make a few changes to the control panel and artwork but the main design will likely stay the same. I must say that a 4-player control panel is certainly appealing, but for the price and space, a small USB port on the bottom (as suggested by Sasquatch) may make things more practical.

I have a friend who works at a sign shop and he said i could bring him my medium-density fiberboards and he could type all the designs into the computer and get this .... the computer will cut everything perfectly on its own! Button holes, plexiglass and everything! So the woodworking seems like it'll mostly be done by machine, and I can't say I'm disappointed. :-) Yeah I know, I lose points on the do-it-yourself scale.

For now... more research on the BYOAC Forums... (http://forum.arcadecontrols.com)